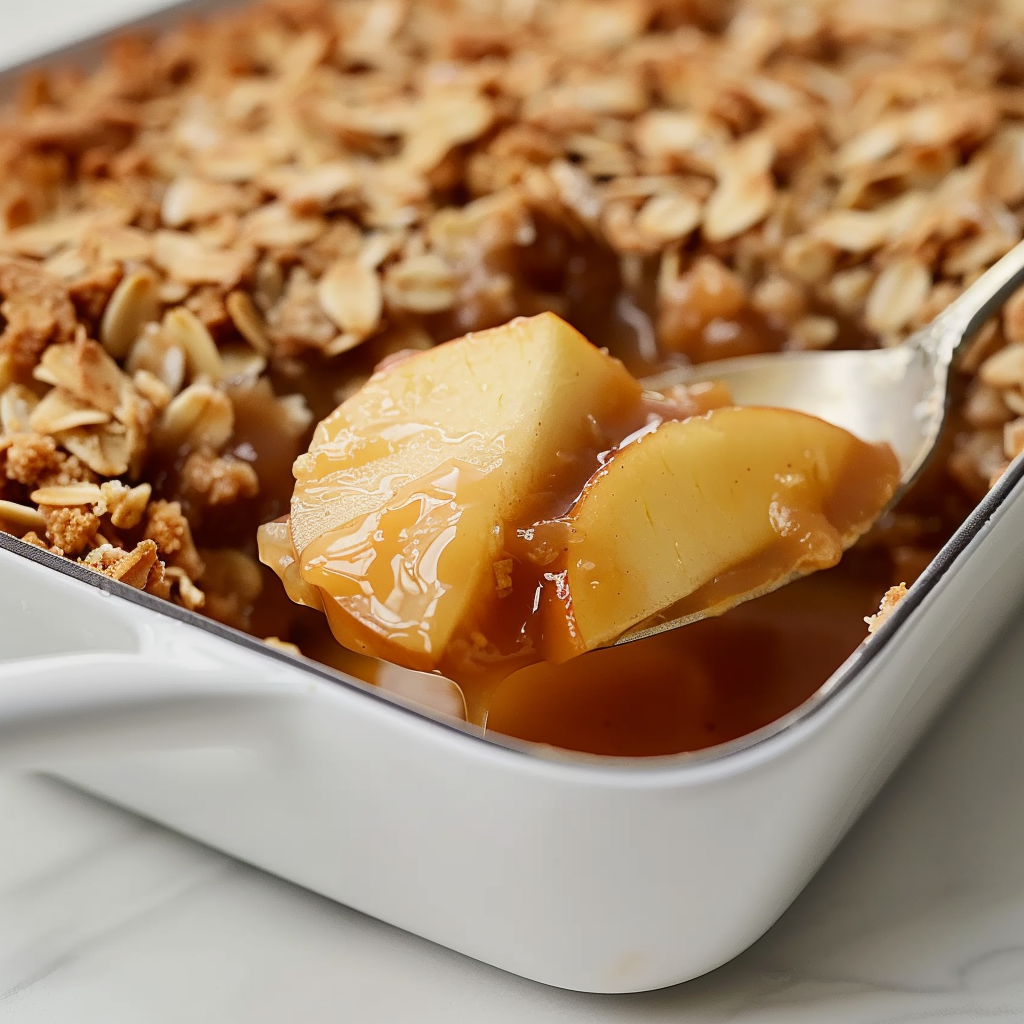
Apple Crisp with Canned Apple Filling is like a warm hug on a chilly day, filling your kitchen with the sweet aroma of cinnamon and sugar. Imagine golden-brown oats and butter mingling together, creating the perfect crunchy topping that contrasts beautifully with soft, spiced apples beneath. This dessert is not just food; it’s nostalgia served in a dish.
Picture this: It’s fall, leaves are falling, and there’s a hint of pumpkin spice in the air. You’re sitting on your couch, wrapped in a cozy blanket, reminiscing about childhood memories spent in Grandma’s kitchen as she whipped up her famous apple crisp. Each bite is an explosion of flavor that transports you back to simpler times when dessert was the highlight of every family gathering. Whether you whip it up for Thanksgiving or simply need a sweet pick-me-up after a long week, this recipe will become a beloved staple in your home.
Why You'll Love This Recipe
This apple crisp recipe is incredibly easy to prepare, making it perfect for busy weeknights or last-minute gatherings.
- The flavor profile combines tartness from canned apples and sweetness from brown sugar for an irresistible treat.
- The golden topping adds visual appeal and texture that will have everyone asking for seconds.
- Plus, it’s versatile enough to be enjoyed warm with ice cream or cold as breakfast leftovers!
Ingredients for Apple Crisp with Canned Apple Filling
Here’s what you’ll need to make this delicious dish:
- Canned Apples: Opt for sliced canned apples packed in juice rather than syrup for less sweetness and better texture.
- Brown Sugar: Use light or dark brown sugar to add depth and richness to your apple filling.
- Ground Cinnamon: This spice is essential; it enhances the warm flavors that make apple crisp so comforting.
- Oats: Old-fashioned oats give the topping a hearty texture while absorbing all those wonderful flavors.
- All-purpose Flour: Used in the topping to help bind everything together and create that satisfying crunch.
- Unsalted Butter: Melted butter brings richness and helps achieve that golden-brown color in your crisp.
- Salt: Just a pinch enhances all the flavors without being noticeable; it’s magic!
The full ingredients list, including measurements, is provided in the recipe card directly below.

How to Make Apple Crisp with Canned Apple Filling
Follow these simple steps to prepare this delicious dish:
Step 1: Preheat Your Oven
Begin by preheating your oven to 350°F (175°C). This ensures that your apple crisp bakes evenly while filling your home with delightful aromas.
Step 2: Prepare Your Baking Dish
Grab an 8×8-inch baking dish and lightly grease it with nonstick cooking spray or butter. This prevents any sticky situations later on!
Step 3: Mix the Filling
In a bowl, combine drained canned apples with brown sugar and cinnamon. Stir until everything is well-coated before pouring this sweet mixture into your prepared baking dish.
Step 4: Create the Topping
In another bowl, mix oats, flour, melted butter, brown sugar, and salt until crumbly. You want it to resemble coarse sand—yes, I know it sounds odd but trust me.
Step 5: Assemble
Evenly spread the oat mixture over the apple filling. Be generous; this topping is where all the magic happens!
Step 6: Bake It Up
Bake in the preheated oven for about 30-35 minutes until the top is golden brown and crispy. You’ll know it’s done when you can’t resist peeking through the oven door!
Serve warm with vanilla ice cream or whipped cream for an indulgent treat! Enjoy this delightful Apple Crisp with Canned Apple Filling—it’s sure to become your new favorite comfort dessert!
You Must Know
- This delightful apple crisp with canned apple filling is not just a treat for your taste buds; it also saves you time.
- With its warm, gooey center and crunchy topping, it’s perfect for cozy gatherings or a sweet solo indulgence.
Perfecting the Cooking Process
Start by preheating your oven to 350°F. While that’s heating up, mix your canned apple filling with cinnamon and sugar in a bowl. Then, prepare your crumb topping before layering everything in a baking dish. Bake until bubbly and golden brown for the best results.
Add Your Touch
Feel free to swap out the spices in your apple crisp with nutmeg or pumpkin spice for a seasonal twist. You can also add nuts like pecans or walnuts to the topping for extra crunch. Experimenting keeps things fun and delicious!
Storing & Reheating
Store leftover apple crisp in an airtight container in the fridge for up to three days. Reheat individual portions in the microwave or pop them back in the oven at 350°F for about 10 minutes to restore that crispy texture.
Chef's Helpful Tips
- For the best flavor, use high-quality canned apple filling; it makes a world of difference.
- Don’t skip letting the crisp cool slightly before serving; it’ll hold together better.
- A scoop of vanilla ice cream on top?
- Yes, please!
Sharing this recipe reminds me of a family gathering where my cousin declared my apple crisp “the best thing since sliced bread,” and I had to resist the urge to take full credit while secretly enjoying their compliments!
FAQs :
What is the best way to serve Apple Crisp with Canned Apple Filling?
Serving Apple Crisp with Canned Apple Filling is best when it’s warm. Consider topping each serving with a scoop of vanilla ice cream or a dollop of whipped cream for added richness. The contrast between the warm crisp and cold toppings creates a delightful experience. You can also sprinkle some cinnamon on top for extra flavor or drizzle caramel sauce to elevate the taste even further. Enjoy it as a dessert after dinner or as a cozy treat any time of the day.
Can I use homemade apple filling instead of canned for this recipe?
Absolutely! While canned apple filling offers convenience, using homemade apple filling can enhance the flavor of your Apple Crisp. If you choose to make your own, ensure the apples are well-seasoned with sugar, cinnamon, and lemon juice for balance. Homemade filling allows you to customize sweetness and spice levels according to your preference. Additionally, fresh apples will provide a firmer texture compared to canned versions, making your crisp even more delicious.
How long can I store leftover Apple Crisp with Canned Apple Filling?
You can store leftover Apple Crisp with Canned Apple Filling in an airtight container in the refrigerator for up to four days. To reheat, place individual portions in the microwave or cover the entire dish with foil and warm it in the oven at 350°F until heated through. Note that reheating may soften the topping slightly but will still be tasty. For longer storage, consider freezing it; however, the topping’s texture may change upon thawing.
Can I customize this recipe for dietary restrictions?
Yes! You can easily customize Apple Crisp with Canned Apple Filling to accommodate various dietary needs. For a gluten-free option, substitute regular flour with almond or oat flour. To make it vegan, replace butter with coconut oil or vegan margarine and ensure your apple filling is free from animal products. Adjusting sugar levels can also cater to those watching their sugar intake by using alternatives like maple syrup or stevia.
Conclusion for Apple Crisp with Canned Apple Filling :
In summary, making an Apple Crisp with Canned Apple Filling is simple yet rewarding. This dessert combines ease of preparation with delicious flavors that everyone loves. You can serve it warm with ice cream or customize it based on dietary needs. Whether using canned filling for convenience or opting for homemade variations, this dessert remains a crowd-pleaser at any gathering. With proper storage techniques, you can enjoy leftovers without compromising on taste or texture.
Apple Crisp with Canned Apple Filling
Apple Crisp with Canned Apple Filling is a heartwarming dessert that brings the comfort of home to your table. This easy-to-make recipe features sweet, spiced apples layered beneath a crunchy oat topping, creating a delightful contrast of textures. It’s perfect for busy weeknights or special gatherings, and best served warm with a scoop of vanilla ice cream. Let the aromas of cinnamon and baked apples fill your kitchen as you whip up this nostalgic treat.
- Prep Time: 10 minutes
- Cook Time: 35 minutes
- Total Time: 45 minutes
- Yield: 8 servings 1x
- Category: Dessert
- Method: Baking
- Cuisine: American
Ingredients
- 2 cups canned sliced apples, drained
- 3/4 cup brown sugar
- 1 tsp ground cinnamon
- 1 cup old-fashioned oats
- 1/2 cup all-purpose flour
- 1/4 cup unsalted butter, melted
- 1/4 tsp salt
Instructions
- Preheat your oven to 350°F (175°C).
- Lightly grease an 8×8-inch baking dish.
- In a bowl, mix the drained canned apples, brown sugar, and cinnamon until well-coated; pour into the prepared baking dish.
- In another bowl, combine oats, flour, melted butter, brown sugar, and salt until crumbly; spread over the apple mixture.
- Bake for 30-35 minutes until the top is golden brown and crispy.
Nutrition
- Serving Size: 1/8 of the dish (approximately 150g)
- Calories: 220
- Sugar: 12g
- Sodium: 80mg
- Fat: 9g
- Saturated Fat: 5g
- Unsaturated Fat: 3g
- Trans Fat: 0g
- Carbohydrates: 35g
- Fiber: 2g
- Protein: 2g
- Cholesterol: 15mg
Keywords: For added texture, incorporate chopped nuts like pecans or walnuts into the topping. Use nutmeg or pumpkin spice for a seasonal twist. Leftovers can be stored in an airtight container in the fridge for up to four days.


